| Products | Support | Download | Contact | |||||
| Products | Support | Download | Contact | |||||


Contents | Index | About the Icons
![]()
IMPORTANT NOTE: You must be using the PostScript print driver for Windows, from Adobe Systems Incorporated.
1) Select Print... from the File menu of theapplication used to create the form to open the following dialog box:
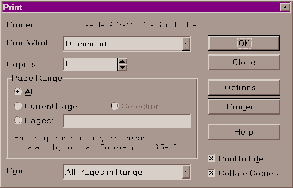
2) Select the Print to File check box in the lower right corner and then click the Options... button. This opens the Print Setup window:
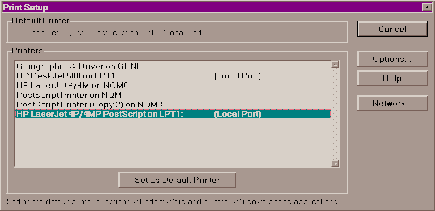
3) Select a PostScript printer and click the Options...button to display the PostScript Properties dialogue box.
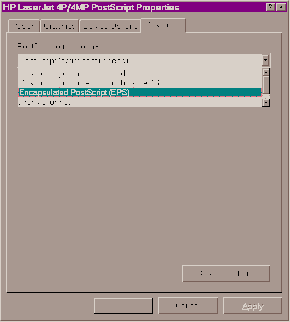
4) Click the PostScript tab at the top of thedialog box, and select Encapsulated PostScript (EPS) from the drop-down menu.
5) Click OK to close the dialog boxes and display the following:
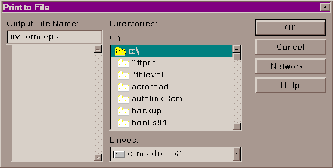
6) Enter the name of your output file (with an .eps file extension), select a destination folder, and click OK. Your EPS file is now available for use.
This procedure assumes you are using the PSPrinter 8.3 printer driver for Apple Macintosh and Macintosh compatible computers, available from Adobe.
1) Select Chooser from the Apple menu to display theChooser dialog box:
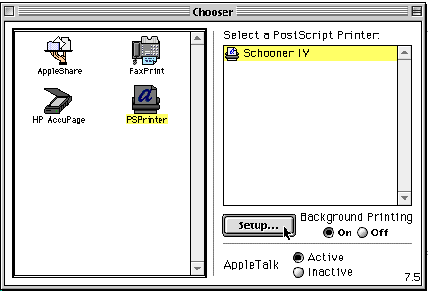
2) Select the PSPrinter icon, and choose a printer from the list to the right.
3) Click the Setup... button, to display the Setup dialog box:
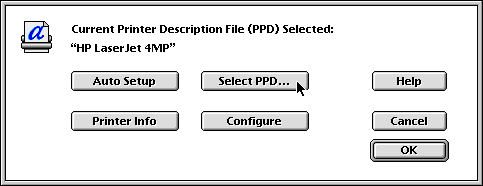
4) Click the Select PPD... button:
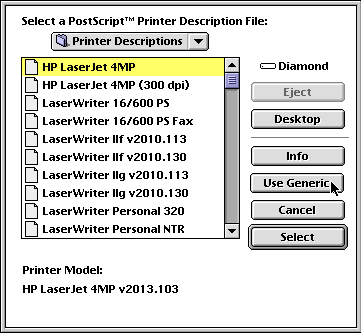
5) Click the Use Generic button in the resulting dialog box which selects the generic printer description file and closes the window.
6) Click OK in the Setup dialog box to exit to the Chooser.
7) Close the Chooser.
8) Return to the application used to create the formand select Print... from the File menu to open the Print dialog box:
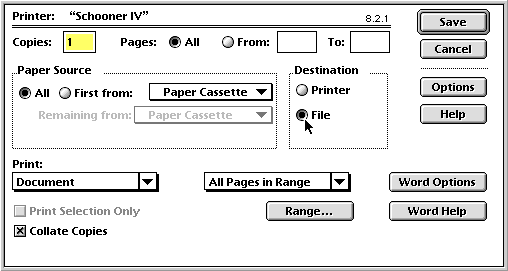
9) Select File for Destination and click Save. The following window is displayed:
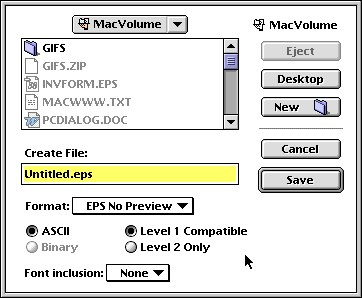
10) Select EPS No Preview from the Format drop-down menu, and make sure that Font inclusion is set to None.
11) Select a destination folder, enter the name for your output file (with an .eps file extension), and click Save.
Your EPS file is now available for use.
| © 2020 GrayMatter Software Corporation | Privacy policy | Terms of use |