Get the techincal information about the latest release of XENTIS

Building a XENTIS Report

We keep saying that it if you know your data, where to find the customer number, what name has been given to the customer's street address field, what Order_Ship_Date means, that building a meaningful report with XENTIS is a snap. So, lets show you how easy it really is...

Notice: Continue reading only if you hold a programming-type job. This is Top Secret stuff to which corporate executives and all managers should not be privy... They might get the "Report Creating" bug and we know that there are far more important things these people should be doing with their time... For instance: taking two hour lunches.

Preparation:
This is the hard part... We can't build a report unless we know how to find the data we'll need. This is the same if we were to search the file cabinets down the hall or query the corporate databases. You have to know where the data is stored -- which file cabinet or which data file. You know what the data is called -- Vendor_Name or Vendor_Nam, is it Vendor_No or Vendor_Number, etc. And you need to know if the data you will be looking at is a Date, Text, or a Number (While that may seem trivial, after you chase Vendor_Number for an hour only to find out that while it would appear from the name of the data field that this is a number, the "number" is actually a text string holding the characters 0 through 9.

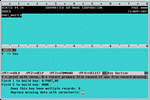
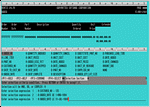
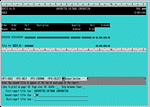
Click on any of the thumbnail images to see the full size screen picture. Click your browser's "Back" button to return to this monologue.

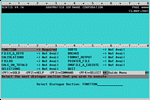
Click image to enlarge, use your Back button to return to this document. XENTIS can help you with this task. Start up XENTIS and then on the main XENTIS menu find the option number 2 -- Dictionary Menu.


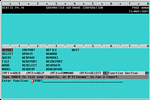
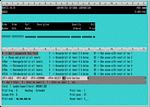
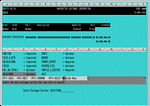
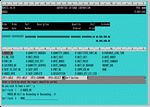
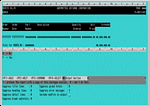
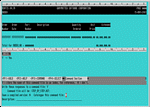
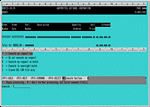
Click image to enlarge, use your Back button to return to this document. On this menu are two options that will help you identify the names, data-types, and files that you will need while building XENTIS reports -- items number 2 and 3 -- "Brief" and "Full listing of dictionary". Myself, I prefer to run the "Full" listing to a text file in my default directory and then I can cruise that with an editor anytime I need information about the structure of my data.


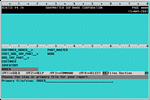
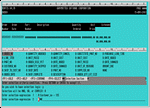
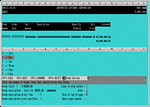
Click image to enlarge, use your Back button to return to this document.


All of this came from those two "boring" preparation and planning steps above.

Here is each and every step necessary to create this report:
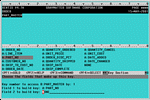
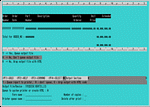
Start XENTIS Click image to enlarge, use your Back button to return to this document.

At the Main XENTIS Menu, select Reports
Click image to enlarge, use your Back button to return to this document.

At the Reports Menu, select Create a new report
Click image to enlarge, use your Back button to return to this document.

Next, XENTIS wants to know what function we're going to do and we just press Enter for the list of those available.

Click image to enlarge, use your Back button to return to this document.

The default function is "Report" so pressing Enter again selects that option.


Click image to enlarge, use your Back button to return to this document.

If we're going to build a report, XENTIS needs to know from which files. Pressing Enter will take us into this section of defining the report.
Click image to enlarge, use your Back button to return to this document.

The basis for our report will be the Orders file, so highlight ORDERS by moving with the arrow keys and pressing Enter. We'll accept the "Shared" access so continue with a second press of the Enter key.


Click image to enlarge, use your Back button to return to this document.

XENTIS is happy now that we have one file for our report and gives us the default of "NONE" for the next file, but we need the part description and we'll find that in the PART_MASTER file, so with the arrow keys, move the highlighting to PART_MASTER and then press Enter. Another Enter accepts the "Shared" access.
Click image to enlarge, use your Back button to return to this document.

We're done telling XENTIS which files we will be using, so press Enter to accept the default "NONE."


Click image to enlarge, use your Back button to return to this document.

Now we define the Keys to use. In the window are the possibilities. Lets use the default ORDER NO + LINE NO so just press Enter. We'll read through the entire file, so two more Enters accept the First Record through Last Record span.


Click image to enlarge, use your Back button to return to this document.

The two files we are using must be linked in some manner. The default displayed is PART_NO which says that we'll take the Part Number from the Order and find it in the Part Master file. That's good, so press three more Enters to build the key.


Click image to enlarge, use your Back button to return to this document.

Now, unless your database administrator has been taking long lunches too, we expect to find a Part Number in the PART_MASTER file for each Part Number in an order, but XENTIS wants to be prepared for all cases, so we press Enter a couple more times to accept these defaults.
Click image to enlarge, use your Back button to return to this document.

Done with specifying our files and keys, XENTIS is now ready for us to define any Calculations we need. Press Enter and then a "Y" to enter the Calculations Section.


Click image to enlarge, use your Back button to return to this document.

Displayed in the window are all of the fields from both of the files we selected to help us build our calculation. From our plans, we enter as Calculation 1 the math for extending the quantity times the price and press Enter. There will be no more calculations, so we accept the default with another Enter.
Click image to enlarge, use your Back button to return to this document.

Now we need to describe to XENTIS the columns of data from left to right. Watch the window area as we define each field XENTIS will show the layout being defined. Press Enter to begin.


Click image to enlarge, use your Back button to return to this document.

XENTIS will suggest that Order Number be the first field and by the design of our report, that is correct, so press Enter. We step through the prompts accepting the defaults except for the Print Frequency where we change the default "D" to "F" for only display on the first line.
Click image to enlarge, use your Back button to return to this document.

Our next field will be Order Date so with the arrow keys, scroll until A:ORDER_DATE is highlighted and then press Enter. Change the print frequency to "F" again because there is only one date per order and then accept the defaults for the rest of the field.

Click image to enlarge, use your Back button to return to this document.

Next comes the part number. Highlight A:PART_NO, press Enter and then accept all the defaults for this field.


Click image to enlarge, use your Back button to return to this document.

Now we need the Part Description which comes from the B: file. So use the arrow keys to move the highlight to the second column of fields and then down until B:DESCRIPTION is highlighted. Press Enter and then accept each of the defaults. Note the "growing" report format in the upper window?
Click image to enlarge, use your Back button to return to this document.

A:QUANTITY_ORDERED is back in the first column. Accept all of the defaults.


Click image to enlarge, use your Back button to return to this document.

Repeat this for A:UNIT_PRICE with the defaults.


Click image to enlarge, use your Back button to return to this document.

Note as we pass the width of an 80-column report that the screen changes so that we now have a 132-column display? The last field we need is that of our calculation -- Amount_Due. Careful now, we want to change some things. Accept "D" for the print frequency, but change the heading from "Amount Due" to "Extended." Then change the Accumulation Level from "N" to "0." No more fields are needed so press Enter with on the "NONE."
Click image to enlarge, use your Back button to return to this document.

Next we need to tell XENTIS in which company we are interested and between which dates. So highlight SELECTIONS and press Enter. We're going to use AND selection meaning that to be selected, the data record must meet all of our selection expressions.


Click image to enlarge, use your Back button to return to this document.

First we use Selection 1 to tell XENTIS that we want to company number to be equal to "135" just because I know that this is the number of the company we want to report. We do this with the expression A:CUSTOMER_NO = 135


Click image to enlarge, use your Back button to return to this document.

To get the data between a date range we use two expressions, one for the bottom of the range and the other for the top. With that we're done and accept the "NONE" for the 4th expression. We will be reading ALL records.
Click image to enlarge, use your Back button to return to this document.

Next is the SORTS section. Yes, we will have sorts, we will sort on the A:ORDER_NO field and it will be "Ascending." There will be no second sort criteria.


Click image to enlarge, use your Back button to return to this document.

Now, because we want a total of each order, we select the BREAKS section, select break on A:ORDER_NO, and the defaults. There will be no second break selection so accept "NONE."

Click image to enlarge, use your Back button to return to this document.

We must select someplace for our report to go and that is done in the FORMAT_OUTPUT section. We want this report to go to our default directory/drive under the name XENTIS.LIS and we don't, at this time, want the output to be in HTML.
Click image to enlarge, use your Back button to return to this document.

Next we select the number of lines per page, the page size, and enter the Heading for the Report.


Click image to enlarge, use your Back button to return to this document.

We can, but chose not to suppress a bunch of stuff.


Click image to enlarge, use your Back button to return to this document.

Last to be done is to give this Report Control File a name and Execute it. This is done in the CMDFILE_&_EXECUTE section.
Click image to enlarge, use your Back button to return to this document.

This is completed with the command to execute the report.


Click image to enlarge, use your Back button to return to this document.

The report runs.


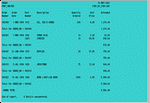
And the finished report looks like:
Click image to enlarge, use your Back button to return to this document.

Wow. So, Can I put this on our Intranet?
You most certainly can. XENTIS will, at your request, create an index page and based on the parameters of how many lines of data per page split the report up into "data" pages, putting the first line of data found on each page onto the index page and create the necessary navigation links to let you cruise from/to the index page and between data pages. Cool?

As the number of pages in your report could change, if this were a monthly report that you ran and then uploaded to your Intranet site, your Web Master can build his/her menu to link to the report's index page. That will be constant each month. Then, the index page will deal with the varying number of "data" pages in the monthly report. The report name remains constant. You run the report and then send each of the pages to the Web Master. They simply overlay last month's pages with the new material and no changes need be done to their menu structure.

Here is our report "printed" as a "preformatted" HTML report. Note the navigation links (which, due to the static nature of this document, don't work, but we promise that on your report, they will).

Click image to enlarge, use your Back button to return to this document. Click image to enlarge, use your Back button to return to this document. Click image to enlarge, use your Back button to return to this document.
The Index Page. Note that the first line of date from the appropriate page is included to help you find the "page" you need. This is page 1 of our report. Note the navigation links back to the index and forward to the next page.

This is page 2 of our report, obviously a trivial example, but do you need a 4,000 page report as an example?


XENTIS Maintenance customers can contact support_xen@graysoft.com for the details. We can even show you how to have your company logo, a background, and one of those "Do Not disclose outside..." statements, etc. automatically included as part of every report page. Now, that looks professional.


Super. Even better...
That HTML report was using the <pre> tag and looks sort of 60-ish. XENTIS is capable of writing your reports as HTML tables giving you more flexibility as to the resolution of the monitor in use by your users.

Click image to enlarge, use your Back button to return to this document.

GrayMatter Home | XENTIS Home | Download Software | XENTIS Technical Support | Contacting GrayMatter | XENTIS News


Comments? Send us your feedback.

www.graysoft.com
 

 © Copyright 2020 GrayMatter Software Corp.
All rights reserved.